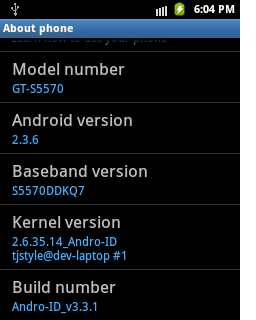
HOW TO FLASH Andro-id v3.2 or 3.3.1
Disclaimer : Do It At Your Own Risk!
Note : Those who have Gingerbread OS and any Custom Recovery installed on their device can skip Step 1 and Step 2. Also, those who have any custom rom installed can skip both Step 1 and 2.
4. Copy the downloaded file to your sd-card.
7. NOW Go on Choose Install Zip From Sd Card>Choose Zip From SD Card option and then select the file (named:Andro-id_signed_v3.2.zip
Or Andro-id_v3.3.1_tass_signed.zip_ you downloaded from above) [first flash Rom after flash Update Zip]
Or Andro-id_v3.3.1_tass_signed.zip_ you downloaded from above) [first flash Rom after flash Update Zip]
8. Wait till the rom is flashed/installed on your device. Once done, Wipe Data and Wipe cache from recovery menu.
THANK YOU TO THE DEV OF THIS AWESOME FULLY FEATURE ROM tj_Style (want to thanks developer)
10.For Andro-id 3.3.1 please replace camara.apk with this one.
HAVE A NICE DAY :D

Sign up here with your email


Yorumlarınız için teşkür ederim Conversion Conversion Emoticon Emoticon